Install Python and configure the work environment on macOS
Installing or updating Python on your computer is the first step to becoming a Python programmer. There are many ways to install: you can download official Python distributions from Python.org, install from a package manager, and even install specialized distributions for scientific computing, IoT, and embedded systems. But in this article, I will shorten the way for you and put in your hands the easiest ways to install Python on Windows and macOS operating systems.
download and install Python on macOS
First of all, you should check the version of Python on your Mac
To check the version of Python on your Mac, first open a command line application, such as Terminal.
How to open Terminal on macOS:
- Press Cmd + .Space keys
- Type Terminal.
- Press Enter.
- You can also open Finder and go to Applications → Utilities → Terminal.
After opening Terminal, type the following commands:
# Check the system Python version
$ python --version# Check the Python 3 version
$ python3 --version# Check the Python 2 version
$ python2 --version
If you have a version of Python on your system, one or more of these commands should respond with a version number.
You will see a result similar to this:
$ python3 --version
Python 3.6.10
How to download and install Python on macOS
There are two ways to install the official Python distro on macOS:
- Official Installer: This method involves downloading the official installer from the Python.org website and running it on your device.
- Homebrew Package Manager: This method involves downloading and installing the Homebrew Package Manager if it is not present undefined You already have it installed.
The official installer and Homebrew package manager will both work, but the official installer is powered by the Python Software Foundation.
How to install from the official installer
Installing Python from the official installer is the most reliable installation method on macOS. It includes all system dependencies needed to develop applications using Python.
You can install from the official installer in two steps.
Step 1: Download the official installer
Follow these steps to download the full installer:
Open a browser window and go to the Python.org downloads page for macOS from the following link
Under "Python versions for Mac OS X" click on the link for the latest version of Python 3 - Python 3.xx. As of this writing, the latest release is Python 3.11.0.
Scroll to the bottom and click the macOS 64-bit installer to start the download.
When the installer has finished downloading, go to the next step.
Step 2: Run the installer
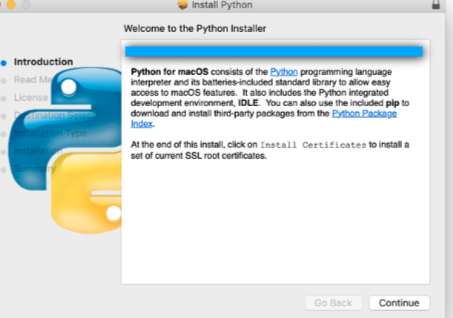
Run the installer by double-clicking on the downloaded file. You will see the following window:

Follow these steps to complete the installation:
Click on undefined “Continue” several times until you are asked to agree to the software license agreement. Then click OK.
A window will appear telling you where to install and how much space it will take. You probably don't want to change the default location, so go ahead and click Install to start the installation.
When the installer has finished copying files, click Close to close the installer window.
You now have the latest version of Python 3 on your macOS!
How to install from Homebrew
For users who need to install from the command line, especially those who will not use Python to develop GUIs with the Tkinter module, the Homebrew package manager is a good choice. You can install from the Homebrew package manager in two steps.
Step 1: Install Homebrew
If you already have Homebrew installed, you can skip this step. If you do not have Homebrew installed, use the following procedure to install Homebrew:

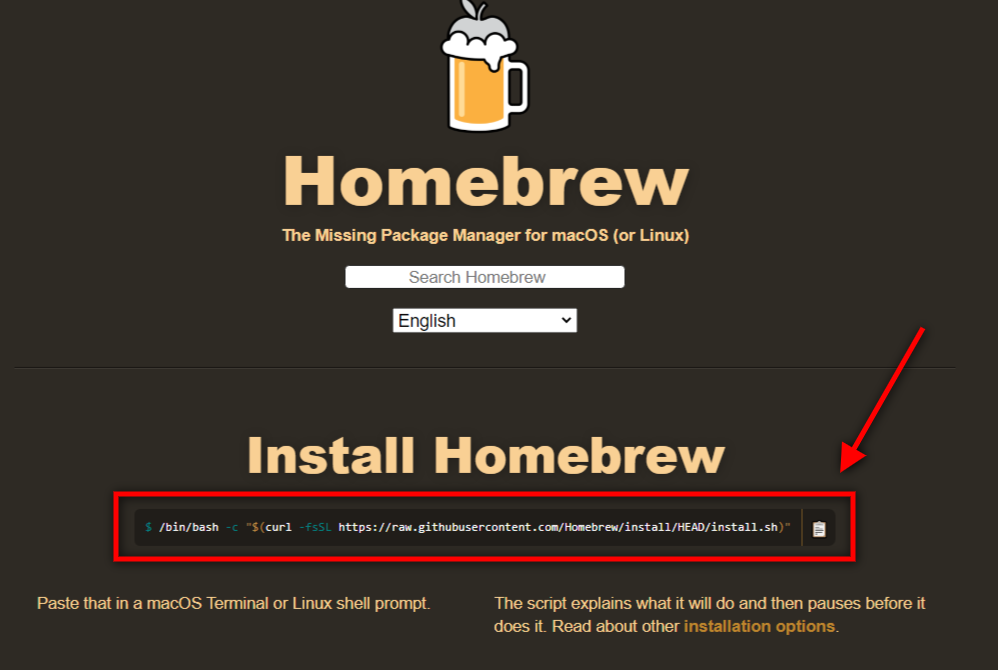
You should see a command to install Homebrew near the top of the page below the "Install Terminal" box. This will be similar to the following:
$ /bin/bash -c "$(curl -fsSL https://raw.githubusercontent.com/Homebrew/install/master/install.sh)"
Highlight the command with your cursor and press Cmd+C to copy it.
Open a Terminal window and paste the command, then press Enter. This will start the Homebrew installation.
Enter your macOS user password when prompted.
Depending on your internet connection, it may take a few minutes to download all the required Homebrew files. Once the installation is complete, you will end up again at a command prompt in a terminal window.
Note: If you are doing this on a fresh install of macOS, you may receive a pop-up alert asking you to install the developer tools from Apple. These tools are necessary for installation, so you can confirm the dialog by clicking Install.
After installing the developer tools, you will need to press Enter to continue installing Homebrew
Step 2: After installing Python
Follow these steps to complete the installation using Homebrew:
Open a Terminal app
Type the following command to upgrade Homebrew:
$ brew update && brew upgrade
Run the command brew install python3$
brew install python3$
This will download the latest version of Python to your device.
you may undefined Ensure that everything ran correctly by testing if you can access Python from the terminal:
Open Terminal.
Type pip3 and press Enter.
You should see the help text from the Pythonpip package manager. If you receive an error message, go through the installation steps again.
Install and create the virtual environment
A default environment is a Python environment that isolates the Python interpreter and the libraries and scripts installed in it from those installed in other virtual environments, and any libraries installed on your operating system.
When you activate the virtual environment for your project, your project becomes a standalone application, independent of the installed Python system and its modules.
At your system command prompt, type the following:
python3 -m venv project_env
At your system command prompt, head to your project folder:
$ mkdir python-virtual-environments && cd python-virtual-environments
Create a new virtual environment inside the folder
python3 -m venv project_env
Activate the virtualenv environment
$ source project_env/bin/activate
(project_env) $
more information:
You may wish to refer to the following resources for additional information on this topic.
Documenting Python: Creating a Virtual Environment
Conclusion:
You can now access the latest version of Python for your system. Your journey in learning Python is just beginning.
In this lesson you learned how to:
Check which version of Python is installed onundefined your system, if any
We learned to install the latest version of Python on MacOs
We created the working environment
You are now ready to start learning Python programming! Be sure to share your learning progress and ask any questions you may have in the comments below.
undefined
Tags
Python macos
Share page
About author

Ahmed Obaid
Hello, I am Ahmed Obaid, an Egyptian Arabic programmer. I would like to put my experiences learning Python on this site So that it will be a reference for you and me as well.
Sign up to leave a comment